
Is it time to finally bring out that sewing machine in your closet? Sewing is an extremely useful skill while also remaining to be a fun hobby on top of its practicality. I believe it would be safe to say that almost all of our grandmothers have sewn in the past and now, perhaps they left behind an old sewing machine and it’s your turn to take in the tradition. Or maybe you simply want to learn the art of sewing. Whether you have just dug out that old machine from the back of the closet or pulled your new machine out of its box, the first thing we need to do in order to get started on our craft is to thread the machine.
Before we begin threading our machine, consider looking for your sewing manual for a simple, guided step-by-step instruction along with a diagram of the process to get you started. Now, let’s get ready to thread that machine. Do you have the perfect color for your thread? Great, now let’s wind the bobbin, it is also very important to ensure that the bobbin is threaded correctly, and let’s begin threading the sewing machine.
Here are 10 easy steps to follow when threading your sewing machine:
Step 1: Wind the bobbin and load your wound bobbin.
In order to load your bobbin, you will need to lift your needle and pressure your foot to its highest position and remove the bobbin cover. Once you do this, you can place your bobbin in the round slot located on your machine and pull the end of the thread through your sewing machine’s tension spring and finally replace the bobbin cover.
Step 2: Place the Spool
Look towards the top of your machine. Place a spool of thread on your machine’s spool pin, this can often be referred to as the machine’s thread pin in other sewing guides and manuals.
Step 3: Thread Guide
In this step, you will want to pull your thread through the thread guide at the top left of your sewing machine. The thread guide often looks like a small knob for reference.
Step 4: Thread through the tension knob
Pull your thread down towards you and loop it around the tension discs.
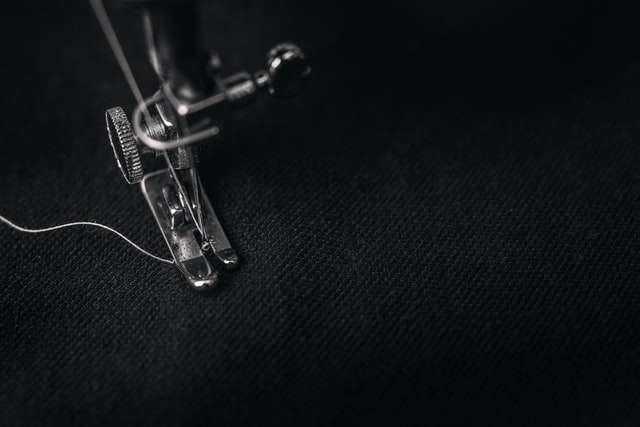
Step 5: Threading through the U-Shaped Guide
The U-shaped guide is also known as the second thread guide. This is where you will find the take-up lever. You will need to pull the thread into the deep groove, like a U-shape, and wrap it around the take-up lever. Then you will need to bring the thread down to the needle. This leads us to the next step.
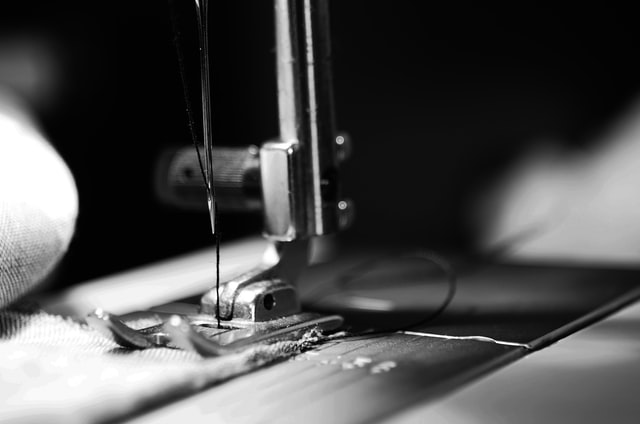
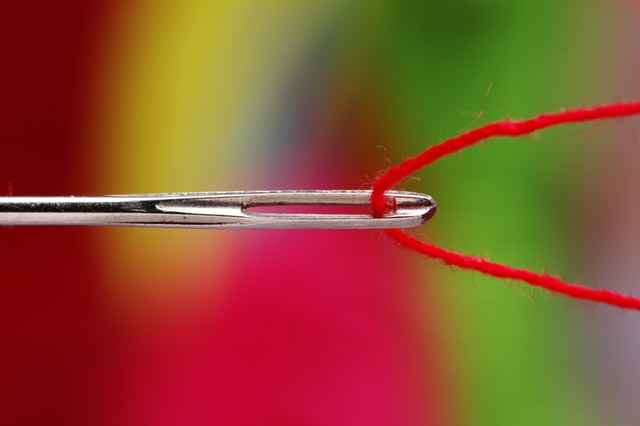
Step 6: Thread the Needle
Sometimes threading the needle can be the most frustrating part throughout the entire process of learning to thread your machine, not because it is difficult to do so, but rather because of the lack of visibility that comes with threading the needle. It’s quite alright, we’ve all been there. So, just how do you thread the needle? The first step to make sure is that you are always threading the eye of the needle from the front to the back. Be sure to continue to pull on the thread until you are certain that you have a good amount of thread through the needle- you will want several inches of thread through the needle.
Step 7: Insert Your Wound Bobbin
Next, you will want to load your wound bobbin and turn the wheel on the side of your machine to hook the top thread and bottom thread through your needle then join the bobbin and top thread.
Step 8: Catch the Thread
As mentioned above, your needle will hook up the top thread with the bottom thread after turning the flywheel. You want to be sure to look for the loop of bobbin thread that is being caught; this may require tweezers to grab.
Step 9: Pull the Threads
Once you have threaded your needle and joined the bobbin and top thread, you will need to gently pull both threads to the back. This should be done with ease and your threads should not snag – if they do snag, you may have made a small mistake, creating a small jam in the machine.
Step 10: Begin Sewing!
At this time, you are ready to begin sewing your crafty project! Now that you have successfully threaded your sewing machine, you should take a scrap of fabric to test your stitches and tension. Your sewing machines will have lines to guide your stitch as well as give you some slack. Place your fabric down and be sure to lower the foot to steady your fabric and connect with the feeder. Did it run smoothly? Congratulations! You have officially learned how to thread your sewing machine!

All sewing machines should come with a manual on how to use the machine safely and most efficiently. If you can dig around your closet or sewing machine box and try to locate this manual, it can be another great tool to add to this step-by-step guide. The sewing machine manual should also give easy steps to follow similar to what was mentioned above, though if you do find that you need a little extra help or maybe some visualization, the manual would be a great place to look. There, you can find diagrams that highlight each part of the sewing machine as well as diagrams that highlight each step in even greater detail through visual learning guides. A final tip would be to look to video guides for an extra visual learning guide. a few great video guides can be found on Skillshare, with a subscription of course, as well as on YouTube – simple, free, and easy! I have highlighted a few videos below from YouTube that can be used for an extra guide on how to thread your machine:
How to Thread Your Sewing Machine Video Guides:
- First Steps: Threading Your Machine.
This video from Darling Adventures goes into great detail on how to begin threading your machine. The sewing machine model used in this video is from Singer, a universal sewing machine.
- Second Step How to Thread a Sewing Machine
This simple and quick tutorial uploaded by Howcast is one of the first results on YouTube when you search: how to thread a sewing machine. It’s simple, quick, and easy to follow.
- How to Set Up a Sewing Machine for Beginners with Angela Wolf
A quick beginner’s guide to threading a sewing machine by Angela Wolf. This is another short video that is just under 4 minutes. Uploaded by Craftsy, this quick tutorial is yet another great visual tool for you to use when threading your sewing machine for the first time.
Now that you know how to thread your machine, you are ready to get sewing! Keep in mind that if you are still running into a few snags here and there, you may simply need to remove your thread and begin again. If you still find yourself struggling, be sure to look through your sewing machine manual for other troubleshooting tips and tricks. So, what are you sewing? Best of luck to you!